
Anúncios
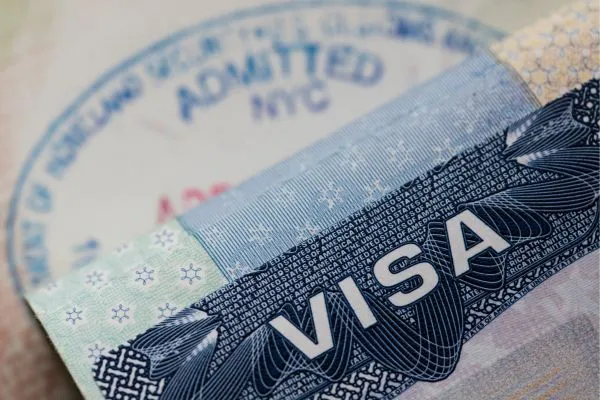
Starting a US Visa application in Nigeria can open doors to a whole new phase of opportunities. Whether it’s for travel, study, or work, your dreams of going to the United States can come true — as long as you know how to prepare properly.
The process has its steps and details, but with the right information, you can avoid mistakes and save time. Things go smoother when you understand what’s ahead.
Want to know the right steps and how to handle each part? Keep reading to discover how to make your US Visa application in Nigeria much easier.
Anúncios
How to Correctly Fill Out the DS-160 Form
The DS-160 form is the first step in the process. It’s compulsory for anyone making a US Visa application in Nigeria and must be completed online in English. Here’s how to fill it out:
-
- Go to the official U.S. Department of State website.
- Select “Nigeria – Abuja” or “Nigeria – Lagos”
- Enter your real details: full name, address, occupation, income, travel plans, and family info
- Answer carefully without leaving any questions blank
- Once done, save and print the confirmation page with the barcode
- Tip: Save your Application ID number in case you need to continue later.
Choose the Right Visa Type for Your Purpose
Before you schedule your interview, you must know which visa to apply for. It depends on your reason for travelling. These are the most common types for Nigerians:
- B1/B2 (Business & Tourism): For short-term visits like tourism, family visits, business meetings or events.
- F1 (Student): For those accepted into a U.S. school, college, or university. It allows full-time study and in some cases part-time work.
- J1 (Exchange): For educational, cultural, or professional exchange programs — from a few months to several years.
- H1B (Specialized Work): For skilled professionals with a job offer from a U.S. company in fields requiring expertise.
Choosing the wrong visa type can delay or even ruin your US Visa application in Nigeria. Always seek advice if you’re unsure.
Anúncios
How to Schedule Your Interview in Lagos or Abuja
After filling out the DS-160, the next step is to pay the application fee and book your interview. Here’s the step-by-step:
-
- Go to the official scheduling website
- Create an account using your email and password
- Pay the MRV fee: $185 USD for B1/B2 and F1 visas (converted to naira)
- Select your interview location: Lagos or Abuja
- Pick an available date and time, then confirm the appointment
- Print your appointment confirmation page
- Note: Book early! Slots fill up fast, especially during peak times.
Documents to Bring on Interview Day
On the day of your US Visa application in Nigeria interview, make sure to bring all required documents. Organize them properly to avoid stress or rejection.
Required Documents:
- Valid passport (at least 6 months valid)
- DS-160 confirmation page (with barcode)
- Appointment confirmation page
- MRV fee payment receipt
- One recent photo (5x5cm, white background)
Additional Documents (Depending on Visa Type):
- Admission letter from school/university (for F1)
- Proof of income, bank statements, or sponsor letter
- Invitation letter or job offer letter (for business/work)
- Evidence of ties to Nigeria (job, family, property, or studies)
Avoid: Large bags, electronics, or metal objects — the consulate has strict security rules.
Fees and Processing Times: What to Expect
During your US Visa application in Nigeria, you must pay a non-refundable consular fee of $185 USD, converted to naira at payment time — even if denied.
Other Possible Expenses:
- Official photo: ₦2,000–₦5,000
- Printing & document costs: ₦1,000–₦3,000
- Transport to Lagos or Abuja (if living in another city)
- Hotel stay (if needed)
Processing Times:
- Interview appointment wait time: 1 week to 1 month
- Visa delivery (if approved): 3 to 10 business days
Plan early, especially if you’re travelling for school, work, or a dated event.
Tips to Succeed in the Visa Interview
The interview is the key part of your US Visa application in Nigeria. It can make or break your approval. Follow these tips to improve your chances:
- Be honest and clear: Answer only what is asked. Don’t over-explain or lie.
- Dress properly: Keep it neat and professional to create a good impression.
- Arrive early: Avoid stress and delays.
- Bring only needed documents: Your passport, DS-160 confirmation, fee receipt, and relevant papers.
- Stay calm: Even if you’re nervous, show confidence and composure.
After Approval or Rejection — What Comes Next?
Once your US Visa application in Nigeria is complete, the outcome will be either approval or denial. Here’s what to do in each case:
If Approved:
- You’ll receive instructions on when and where to collect your passport with the visa.
- Follow the collection instructions carefully to avoid delays.
- Plan your travel based on the visa validity dates.
If Denied:
- Check the reason for denial, usually shared by the consular officer.
- Don’t give up — many get approved after trying again.
- Prepare better for your next interview and fix any issues from your previous attempt.
- You can reapply as many times as needed, as long as you’re ready.
Ready to Start Your US Visa Application in Nigeria?
Handling your US Visa application in Nigeria may seem overwhelming, but with the right steps, you’re much closer to making your plans a reality.
Being organized, paying attention to details, and preparing well are your keys to success.
Start gathering your documents now, fill out your form carefully, and schedule your interview. Every step brings you closer to unlocking the doors of the U.S.!
Frequently Asked Questions (FAQ)
1. What is the first step in the US Visa application in Nigeria?
The process begins with filling out the DS-160 form, which must be completed online in English.
2. How much does the visa application cost?
The main application fee is $185 USD, paid in naira. Additional costs may include photos, document printing, and travel expenses.
3. Where can the visa interview take place?
Visa interviews are held in two major cities: Lagos and Abuja. You can choose the location that is most convenient for you.
4. What documents are required for the interview?
Required items include your valid passport, DS-160 confirmation page, appointment details, payment receipt, and other supporting documents based on your visa type.
5. What if my visa application is denied?
If denied, you can apply again. Many applicants succeed in later attempts by correcting issues and preparing more thoroughly.